Herbs that do more than just smell good.
Basil
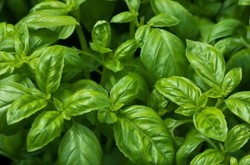
Sweet Basil is one of the most popular kitchen herbs around the world. Known for it’s anise-like flavor and intense clove-like aroma, Dried or fresh, basil is great for cooking or for creating an invigorating atmosphere anywhere in your home. Basil also offers several medicinal uses, including as a deodorizer, anti-arthritic, topical antioxidant, anti-inflammatory, and insect repellent. When eaten, Basil provides us healthy doses of vitamins A, K, and C, as well as magnesium, iron, potassium, and calcium.
Grow your own basil from seed by sowing indoors in the early spring, then transplanting outdoors at least two weeks after danger of frost has passed. Basil can also be easily grown from clippings. To get the most fresh basil leaves from your plants, be sure to remove the flower stalks from mature growth when they appear. (Alternately, you may want to leave some flower stalks as basil blossoms smell wonderful and will attract pollinators to your garden.)
Germination: 5 – 10 days
Hardiness: Annual (very frost sensitive)
Light preference: Full sun / Morning sun, afternoon shade (hotter climates)
Soil conditions: Rich, moist, well-drained, pH 6 – 7
Fertilizer: Incorporate compost or blood meal at time of transplant
high-nitrogen (2:1:1 ratio) every two weeks thereafter.
Height: 24 – 30”
Spacing: 12 – 18”
Time to Harvest: 10 weeks
Chives
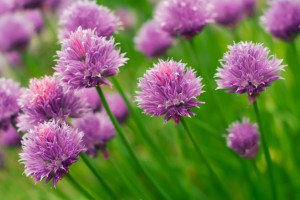
Much like other Alliums (garlic, onions, shallots) growing chives can help to drive away harmful insect pests like aphids and mosquitoes from your garden. Also characteristic of Alliums, chives are high in sulfur – a natural antibiotic. When ingested, chives offer anti-inflammatory and digestive properties.
Dried or fresh chives make excellent additions to fish, soups, potatoes, and vegetable dishes. Dice up immature, unopened flower buds for a light onion-like flavor that is slightly more pungent than chopped chive leaves, but less over-powering than onions themselves.
Grow your own chives from seed by sowing indoors, then transplanting outdoors in the spring or fall. Chives may also be sown directly outside. After several years, divide and replant clumps in early spring. To get the most fresh chives from your plants, remember to harvest by cutting completely across the base of the plant, leaving about 1/2” stubs above ground. Removing all of the leaves at once will encourage the plant to regrow. Preserve chives at the end of the season by drying or by adding fresh herbs to oil, butter, or vinegar.
Germination: 7 – 14 days
Hardiness: Zones 3 – 9
Light preference: Sun / Part shade
Soil conditions: Rich, moist, well-drained
Fertilizer: Incorporate compost at time of transplant and fish emulsion
or other balanced plant food every 3 – 4 weeks thereafter.
Height: 12 – 18”
Spacing: 4 – 8”
Time to Harvest: varies
Cilantro / Coriander
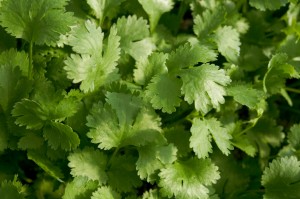
Much like other Alliums (garlic, onions, shallots) growing chives can help to drive away harmful insect pests like aphids and mosquitoes from your garden. Also characteristic of Alliums, chives are high in sulfur – a natural antibiotic. When ingested, chives offer anti-inflammatory and digestive properties.
Dried or fresh chives make excellent additions to fish, soups, potatoes, and vegetable dishes. Dice up immature, unopened flower buds for a light onion-like flavor that is slightly more pungent than chopped chive leaves, but less over-powering than onions themselves.
Grow your own chives from seed by sowing indoors, then transplanting outdoors in the spring or fall. Chives may also be sown directly outside. After several years, divide and replant clumps in early spring. To get the most fresh chives from your plants, remember to harvest by cutting completely across the base of the plant, leaving about 1/2” stubs above ground. Removing all of the leaves at once will encourage the plant to regrow. Preserve chives at the end of the season by drying or by adding fresh herbs to oil, butter, or vinegar.
Germination: 7 – 14 days
Hardiness: Zones 3 – 9
Light preference: Sun / Part shade
Soil conditions: Rich, moist, well-drained
Fertilizer: Incorporate compost at time of transplant and fish emulsion
or other balanced plant food every 3 – 4 weeks thereafter.
Height: 12 – 18”
Spacing: 4 – 8”
Time to Harvest: varies
Dried or fresh chives make excellent additions to fish, soups, potatoes, and vegetable dishes. Dice up immature, unopened flower buds for a light onion-like flavor that is slightly more pungent than chopped chive leaves, but less over-powering than onions themselves.
Grow your own chives from seed by sowing indoors, then transplanting outdoors in the spring or fall. Chives may also be sown directly outside. After several years, divide and replant clumps in early spring. To get the most fresh chives from your plants, remember to harvest by cutting completely across the base of the plant, leaving about 1/2” stubs above ground. Removing all of the leaves at once will encourage the plant to regrow. Preserve chives at the end of the season by drying or by adding fresh herbs to oil, butter, or vinegar.
Germination: 7 – 14 days
Hardiness: Zones 3 – 9
Light preference: Sun / Part shade
Soil conditions: Rich, moist, well-drained
Fertilizer: Incorporate compost at time of transplant and fish emulsion
or other balanced plant food every 3 – 4 weeks thereafter.
Height: 12 – 18”
Spacing: 4 – 8”
Time to Harvest: varies
Lavender
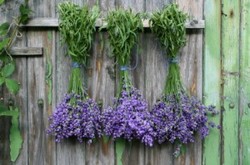
Lavender is one of the most useful and versatile herbal remedies, especially when its natural oils are distilled from the plant. Lavender can also be used as a seasoning and for baking.
Lavender is also a natural deterrent for mosquitoes and other garden pests.
Grow your own lavender from seed by sowing indoors, then transplanting outdoors in early spring. Lavender does not tolerate excessive moisture or humidity so it should be positioned at the top of a slope or high in a planting box. Lavender also does well in containers for this reason, also.
Lavender blooms in the summertime. To encourage flowering all season long, clip blooms regularly either for herbal use or to dead-head once they begin to wilt. Lavender also benefits from light pruning in the spring after the first new growth appears.
Germination: 14 – 21 days
Hardiness: Zones 5 – 7
Light preference: Full sun
Soil conditions: Well-drained, slightly sandy soil, pH 6.7 – 7.3
Fertilizer: In early/mid-fall: add bone meal / other high-phosphorus
fertilizer and water into soil around drip-line.
Height: 12 – 18”
Spacing: 2 – 4”
Time to Harvest: throughout summer
Lemon Balm
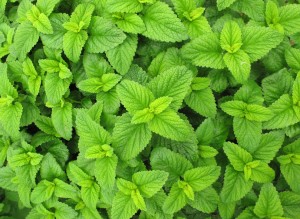
A member of the mint family of herbs, lemon balm is easy to grow and offers several health benefits in addition to its wonderful citrus aroma. Lemon balm naturally eases nerve and muscle tension. The fresh herb can be used as poultice to reduce inflammation and prevent infection. Because of its anti-viral properties, lemon balm may be applied to reduce the healing time of cold sores. When ingested, lemon balm relieves gas, cramping, and stomach upset.
Lemon balm tea is often consumed to promote relation, mental clarity, and alertness. Add fresh lemon balm leaves to salads to spice up your greens with a refreshing citrus kick.
Lemon balm is also a natural repellant for mosquitoes and other flying pests.
Grow your own lemon balm from seed by sowing indoors, then transplanting outdoors in spring or fall. To harvest, lemon balm is one of only a few herbs which may be cut all the way back to rejuvenate the plant. During cold months, lemon balm must be mulched to protect its roots if the temperature is expected to drop below 0°F/-18°C.
Germination: 7 – 14 days
Hardiness: Zones 4 – 9
Light preference: Full sun / Morning sun, afternoon shade (hotter climates)
Soil conditions: Rich, moist, well-drained soil, pH 6 – 7
Fertilizer: At time of planting: Incorporate a balance of nutrients (is: compost,
blood meal) into soil / high-nitrogen fertilizer every 2 weeks thereafter.
Height: 18 – 26”
Spacing: 2 – 4”
Time to Harvest: throughout growing season
Oregano
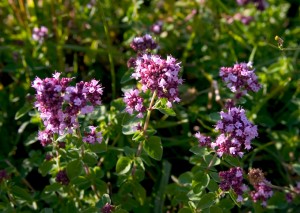
Oils distilled from oregano leaves can be used to treat respiratory maladies, digestive upset, parasitic infections including fungal infections, skin conditions including dandruff and psoriasis, muscle aches and join pain. Oregano is also a natural insect repellant.
In cooking, Oregano is often used for Greek-style dishes. It also makes an excellent seasoning for egg dishes, meats, poultry, legumes, and breads. Try out some of these great recipes!
Grow your own oregano from seed by sowing indoors, then transplanting outdoors in early spring. When harvesting, remember that both Oregano leaves and flowers are edible and possess similar flavors. During cold months, oregano should be mulched or covered with a cold frame to protect roots from freezing.
Germination: 7 – 14 days
Hardiness: Zones 4 – 9
Light preference: Full sun / Morning sun, afternoon shade (hotter climates)
Soil conditions: Well-drained soil, pH 6.5 – 7
Fertilizer: Apply high-nitrogen fertilizer once in spring
when new growth begins to appear.
Height: ground cover / 8 – 24”
Spacing: 12”
Time to Harvest: 11 – 13 weeks
Parsley
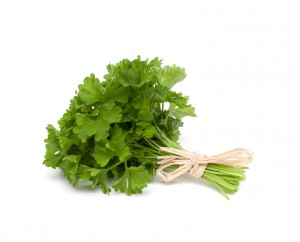
As a natural anti-bacterial remedy, parsley can bolster your immune system and neutralize bad breath. Parsley is also a powerful antioxidant and anti-inflammatory which makes it great for digestion and detoxification. Though pregnant women should stay away from this herb as parsley is also known to induce uterine contractions and can cause miscarriage.
In the kitchen, parsley makes a great addition to spice up your veggie dishes. Try parsley in pesto, tabbouleh, and salad dressings. For more ideas on cooking with parsley, check out these recipes.
Grow your own parsley from seed by sowing indoors, then transplanting outdoors in early spring. Mulch around plants to keep soil moist, but avoid letting mulch touch the stems to prevent rot. To promote thicker foliage, cut parsley down to stems in early fall. In the second year of growth, once flower stalk appear, parsley becomes bitter and unpalatable. You may wish to allow blooming plants to go to seed and harvest for replanting the following year.
Remember when planting parsley that this herb is a favorite food for Black Swallowtail larvae. Be sure to plant enough for yourself and for these brightly-striped critters as they will almost certainly appear on your parsley in the spring and early summer.
Germination: 14 – 30 days
Hardiness:Biennial
Light preference: Sun / Part shade
Soil conditions: Rich, moist soil, pH 5.5 – 6.7
Fertilizer: ncorporate balanced fertilizer at planting time
then high-nitrogen every few weeks thereafter.
Height: varies
Spacing: 12 – 18”
Time to Harvest: 10 – 11 weeks
Peppermint
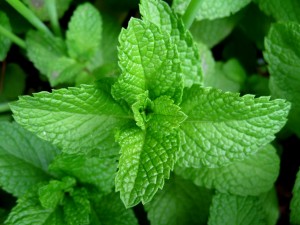
Peppermint is an excellent deterrent for many kinds of pests including rodents, ants, and spiders. Plant this pungent herb around your home and garden to keep harmful critters at bay.
As an herbal remedy, peppermint tea can help to clear sinus congestion, soothe a headache, relax you after a hard day, or help you to stay alert without feeling wound up. The natural oils in peppermint act as a digestive aid, help to relieve menstrual cramps, and can even ease the symptoms of IBS.
Peppermint makes a healthy addition to beverages and desserts. Add a sprig of peppermint leaves to berries and other fruits, coffee, or hot cocoa. Mix up a minty summertime refreshment or try some of these baked delights!
Grow your own peppermint from seed by sowing indoors, then transplanting outside at anytime up to 2 weeks prior to first frost. Peppermint seeds may also be direct sown outdoors and do not need to be covered with soil. Most mint seeds actually germinate better with no soil covering at all as they require lots of light to stimulate them out of dormancy. Peppermint is one of the easiest herbs to grow, but it can also become invasive if not maintained. For this reason, peppermint is often grown in containers.
Germination: 10 – 15 days
Hardiness: Zones 5 – 11 (roots only)
Light preference: Sun / Part shade
Soil conditions: Damp, well-mulched soil
Fertilizer: Apply high-nitrogen fertilizer as needed
(depending on frequency of harvest.)
Height: Ground cover / 6 – 12”
Spacing: 18”
Time to Harvest: throughout growing season
Rosemary
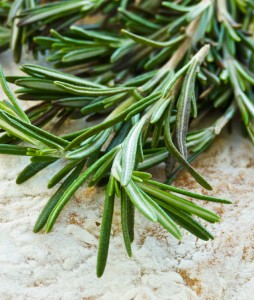
The pungent aroma of rosemary is another natural deterrent for a number of garden pests including mosquitoes and other flying insects. Rosemary also repels cats!
Rosemary is also a powerful natural remedy for soothing indigestion, neutralizing bad breath, and relieving pain. Use rosemary oil or herb-infused water to clear up dandruff, promote hair growth, and relieve skin irritation. The aroma of rosemary can help to clear the mind, quiet anxiety, and relieve everyday stress.
Add fresh or dried rosemary to fish, lamb, chicken, and wild game. Rosemary also compliments beans and sautéed mushrooms.
You can grow your own rosemary from seed by sowing indoors, then transplanting outdoors in the spring. However, rosemary is much easier to grow from clippings as the germination rate of its seeds is very low. Rosemary does well with mulch to keep roots moist in summer and insulated in winter.
Germination: 14 – 21 days
Hardiness: Zones 6 – 10
Light preference: Full sun
Soil conditions: Light, well-drained soil, pH 6 – 7
Fertilizer: Apply balanced fertilizer at time of transplant
then again at first sign of new growth in spring.
Height: 30 – 60”
Spacing: 18 – 36”
Time to Harvest: 11 – 14 weeks
Sage
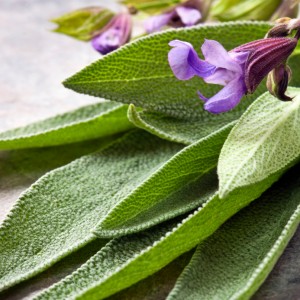
Sage-infused tea is an effective herbal remedy to reverse greying of hair, reduce fever, and calm anxiety from brain and nervous disorders. Sage tea can also be used to soothe gastric ailments brought on by stress and to treat infections of the mouth and throat.
For cooking, dried or fresh sage makes an excellent seasoning in sauces, poultry dressings, and many sausage recipes. Sage also produces edible flowers in the early summer which make an interesting addition to salads and desserts. Both sage leaves and flowers make excellent additions to herbal tea blends.
Grow your own sage from seed by sowing indoors, then transplanting outdoors in the spring. Sage may also be sown directly outside in the springtime. Sage may also be propagated from cuttings. During the first year of growth, harvest only lightly so roots can establish. For both leaves and flowers, allow sage to grow as normal. Harvest flowers when buds are almost fully open. To prevent flowering, simply trim new growth often and remove any buds that appear. Stop harvesting sage 2 months before first frost. Also, when grown as a perennial, sage should be pruned back in early spring – removing older woody branches to make room for young tender growth.
Germination: 7 – 21 days
Hardiness: Zones 4 – 8
Light preference: Sun / Part shade
Soil conditions: Well-drained, slightly sandy soil, pH 6.5 – 7
Fertilizer: Incorporate organic matter to soil before planting.
Height: 16 – 30”
Spacing: 12”
Time to Harvest: 11 – 13 weeks
Tarragon
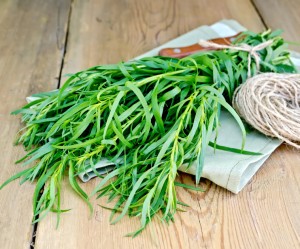
Tarragon is an excellent source of many vitamins and minerals, including antioxidants vitamin C and vitamin A, magnesium, iron, zinc, and calcium. In addition, an herbal tea made from fresh tarragon can help to calm anxiety, kill germs that cause bad breath, and suppress the appetite. Drinking tarragon tea or chewing on fresh tarragon leaves can also be an effective numbing agent for mouth pain. Because of its anti-bacterial properties, oil distilled from tarragon can also be used in formulating natural deodorants.
For culinary use, tarragon’s anise-like flavor makes a great seasoning for chicken, seafood, vegetables, and egg dishes. Tarragon also adds an interesting flavor to salads and berries.
Grow your own tarragon from seed by sowing indoors, then transplant outdoors after last frost. Tarragon can also be easily propagated from cuttings and will spread quickly if live stems are allowed to droop to the ground. This herb does great in pots and requires very little maintenance – only the occasional trim to promote new growth. In cooler climates, tarragon will die back in winter then regrow from root in the springtime. Note that while tarragon is drought-tolerant, this hardy perennial grows faster in moist soil.
Germination: 10 – 14 days
Hardiness: Zones 4 – 7
Light preference: Sun / Part shade
Soil conditions: Well-drained soil
Fertilizer: Not necessary.
Height: 18 – 24”
Spacing: 18”
Time to Harvest: 11 weeks
Thyme
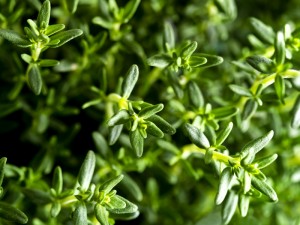
Thyme is a good source of antioxidant vitamin A which is beneficial to eye, skin, hair, and nail health. Thyme is also anti-inflammatory, antiseptic, and antibiotic. Sip thyme-infused tea for an effective natural remedy against colds, coughs, and sore throats. As a topical treatment, use thyme oil to help soothe and heal acne, eczema, and psoriasis. Rinse your scalp with a thyme-infused rinse to treat dandruff and other scalp conditions which may cause hair loss.
In the kitchen, thyme pairs well with other herbs like parsley, onion, garlic, and ginger to add complexity to their individual flavors. Try thyme as a flavoring in stocks, soups, and sauces. Thyme can often be tied with other herbs into a cheesecloth pouch to impart its piney flavor to a recipe without adding its woody texture to the dish.
Grow your own thyme from seed by sowing indoors, then transplanting outdoors in early spring. Thyme makes a beautiful creeping ground cover that also has the benefit of blocking weeds. The tiny blossoms of this marvelous herb will also attract beneficial pollinators like honey bees to your garden. Prune lightly in spring after danger of frost has passed, beginning during the second year of growth. Encourage tender growth by regularly pinching off tips of stems during the growing season. Stop harvesting one month before first expected frost.
Germination: 14 – 21 days
Hardiness: Zones 5 – 8
Light preference: Sun / Part shade
Soil conditions: Well-drained soil (mulch with limestone gravel or
builder’s sand to improve drainage), pH ~7.0
Fertilizer: Not necessary.
Height: 6 – 12”
Spacing: 6 – 8”
Time to Harvest: 13 – 14 weeks

